Vegetable Biryani :
None of us, especially we Indians, can even have enough of a biryani. Biryani is my most favorite rice-based dish. Even if I have to have biryani every day, I won’t mind it at all. So, here’s my chosen recipe of a Restaurant Style Vegetable Biryani that will help you dish out a vegetarian biryani, elaborately at home. Just follow the steps well, and you won’t have any problems in making a lovely hearty biryani at home. The process is a bit lengthy and takes efforts, but the end result is absolutely worth that time.
This restaurant style Vegetable Biryani was first posted more than a decade back. That time, I would always make the Hyderabadi Veg Biryani or my mom’s version of the biryani at home. But since the time I’ve started making this particular recipe too, I haven’t stopped.
Usually in most restaurants, they do not make biryanis the way it is traditionally made, that is assembling the rice and gravy layers and cooking these in a tightly sealed pot. The vegetable gravy is prepped ahead and then lightly mixed with seasoned basmati rice and served.
But some restaurants do serve the real traditional biryani. This particular recipe has similar tastes and flavors with the biryanis served in such restaurants where authentic conventional food is served.
I have experimented and tried many variations of a Vegetable Biryani. After I came across this recipe in Nita Mehta’s cookbook, ‘Taste of Amritsar – Vegetarian,’ I gave it a try and loosely adapted the recipe to suit our taste buds. What I liked in the recipe was the use of freshly ground biryani masala.
Also, there were no tomatoes, chilies or turmeric in this version. Three ingredients that I always end up using in my cooking. I was of the thought process that a biryani without the inclusion of these three ingredients is not possible. But I had an incorrect assumption and this recipe proved it wrong.
One of the most delicious biryanis I’ve made is this truly restaurant-style version. The vegetable gravy isn’t as moist as homemade biryanis tend to be, but rather slightly dry like what you’d find in restaurants. Additionally, this biryani isn’t very spicy; instead, it carries a gentle touch of sweetness.
The flavors of the freshly ground biryani masala as well as the caramelized/browned onions are a hallmark of this Vegetable Biryani and bring out the best in the whole dish. Yes, birista or caramelized browned onions is used in this recipe.
More On The Recipe
By now, I have made this Vegetable Biryani many times. I’ve tried the recipe with both dairy curd (yogurt) as well as a plant-based one like cashew yogurt.
When made with cashew yogurt, no one, including me, could make out the difference that whether a regular dairy or plant based yogurt was used in the dish.
Like I said in the beginning, it is a long process of making the restaurant-style biryani but worth it. Apart from a few, rest of the ingredients are simple and easily available in the kitchen.
For saffron substitute, you can add a pinch of turmeric in some milk or water and then add it on the rice layers.
I cannot imagine my food without green chilies or red chili powder. So, I had to add a little red chili powder in this Vegetable Biryani too.
This biryani with veggies and made with freshly ground masala tastes awesome and I had to share it with all of you. I usually serve this biryani with a fresh onion tomato raita.
Step-by-Step Guide
How to make Restaurant Style Vegetable Biryani
Preparation
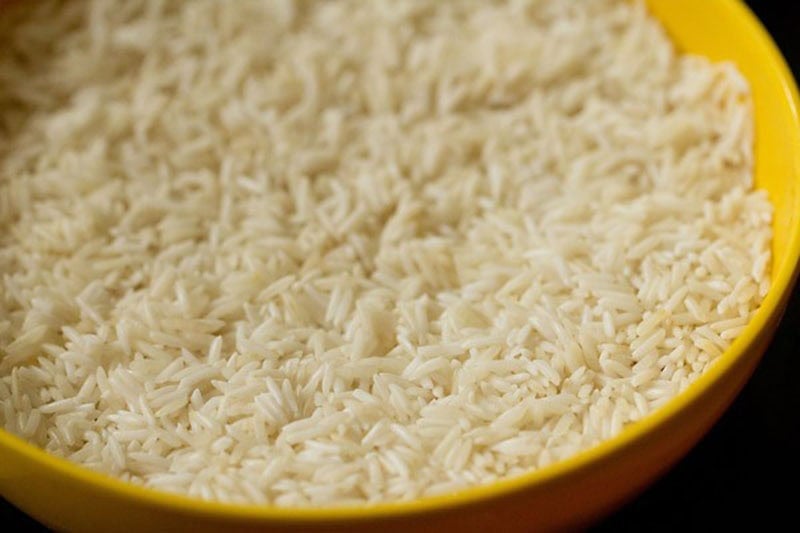
- Rinse 1½ cups (200 grams) basmati rice very well in water. Soak the rice in enough water for 30 minutes. When the rice is soaking, chop all the vegetables and keep aside.

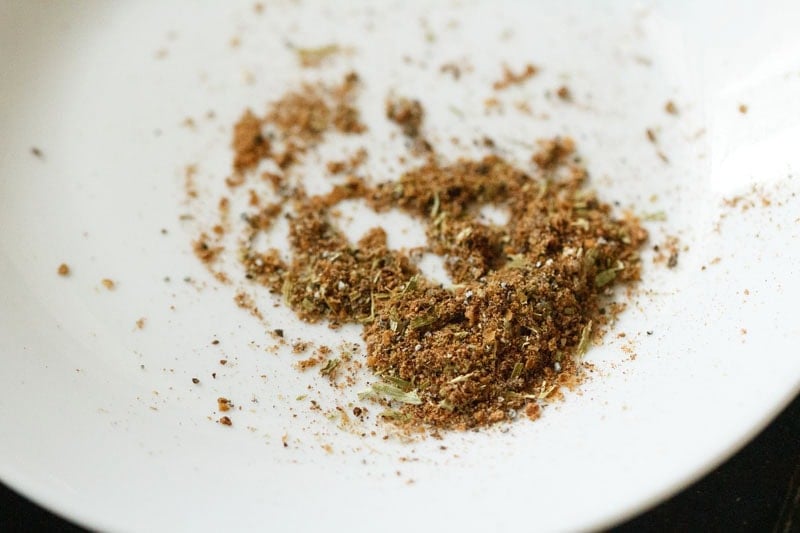
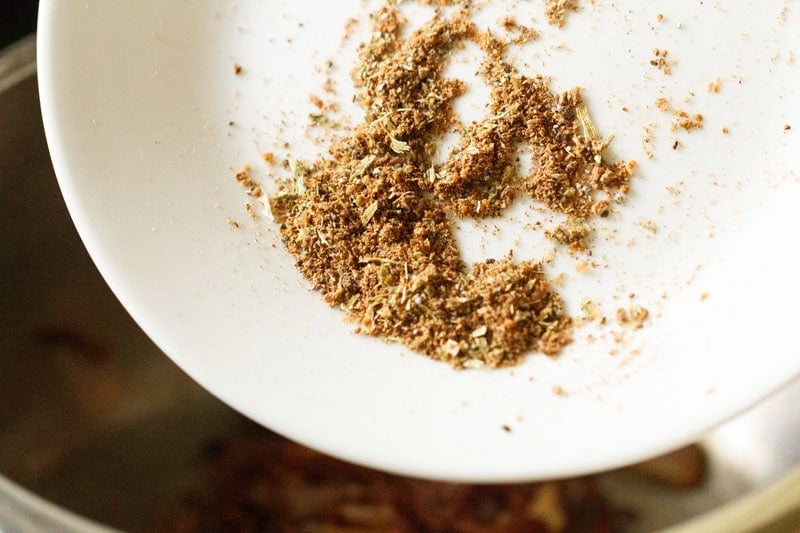
- Prepare the biryani masala. For it, the spices that we use are – 1 inch cinnamon stick, 4 cloves, 4 green cardamoms and a single strand of mace (not the whole mace as it is a strong spice).
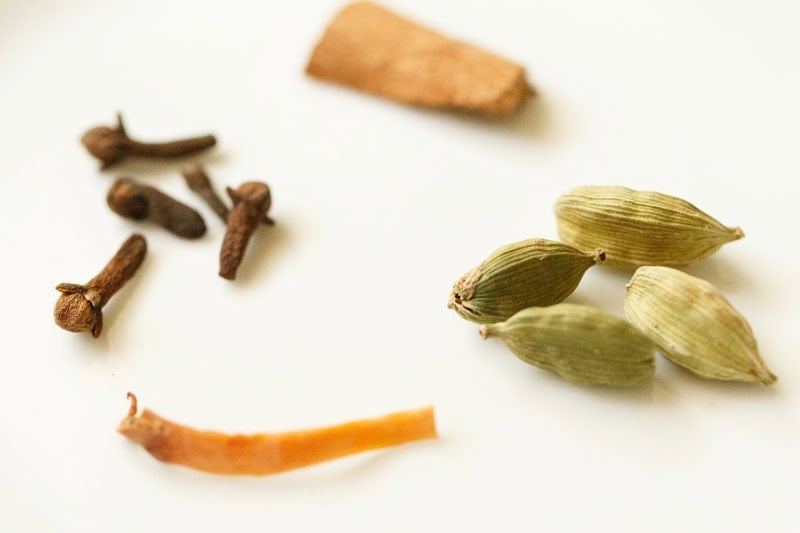
- Add these in a small grinder or spice grinder and grind to a powder. Keep aside.
- After 30 minutes, drain all the water from the rice and set the soaked rice aside.
Prepare Rice
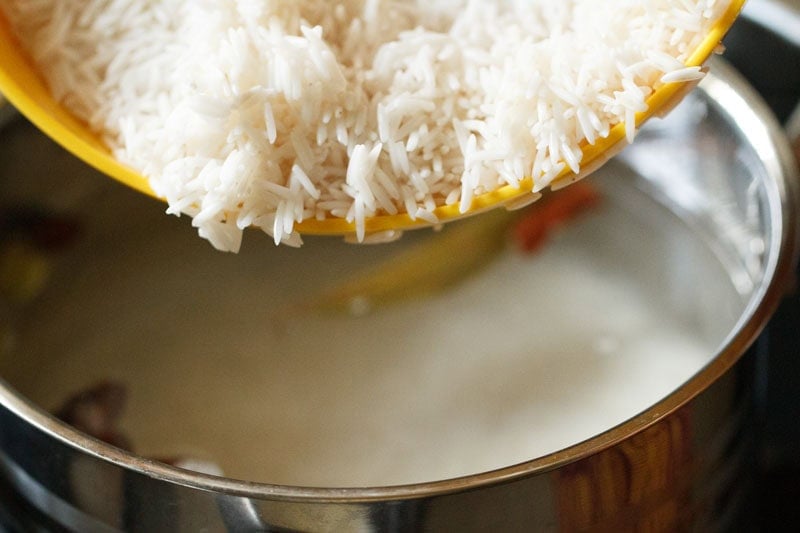
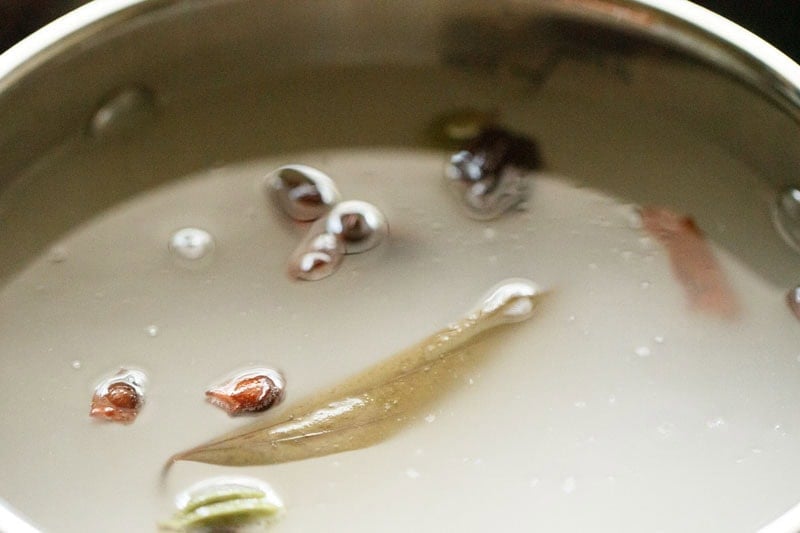
- Heat 5 cups water. When hot, add 3 to 4 green cardamoms, 1 inch cinnamon, 1 medium tej patta (Indian bay leaf), 2 star anise and 1 black cardamom.
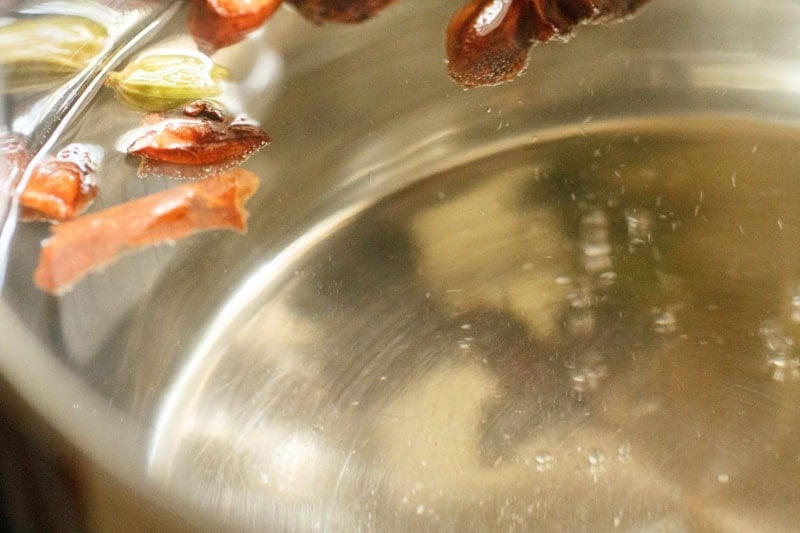
- On high heat, bring the water to a boil. Then, add the rice. Also, add ¾ teaspoon salt or as per taste.
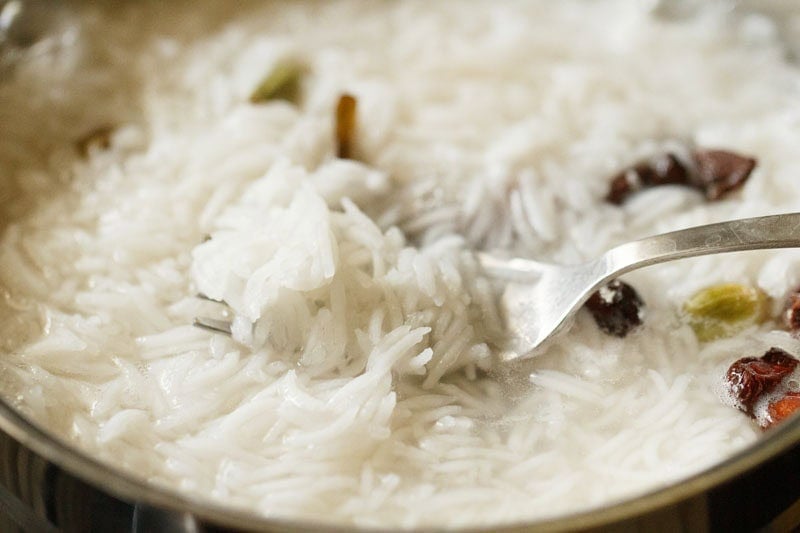
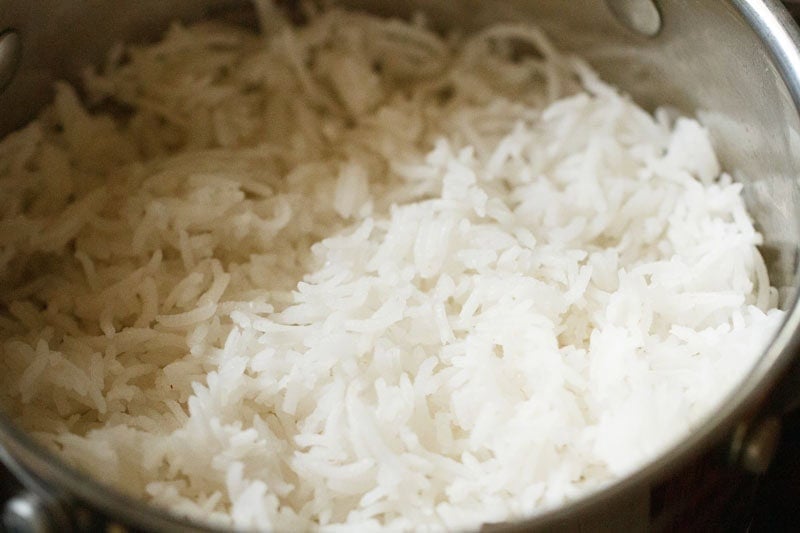
- Cook the rice on high heat till it is 75% cooked.
- There should be some bite in the rice.
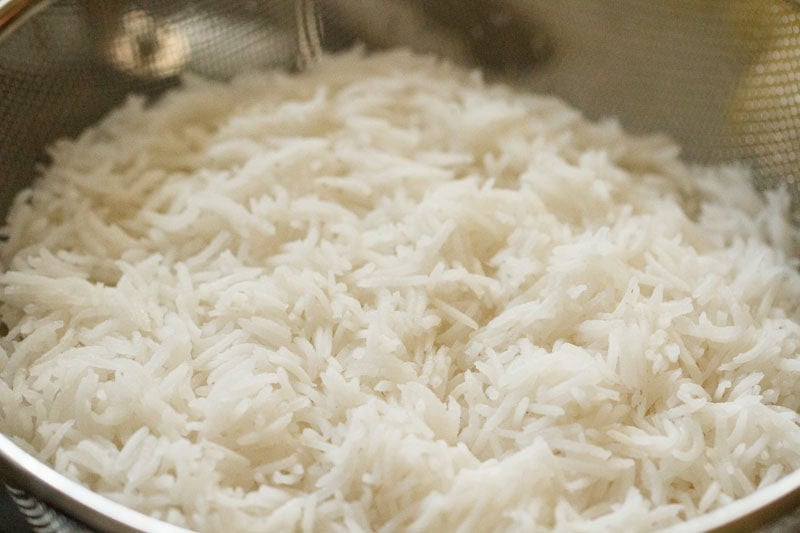
- Drain all the water from the rice thoroughly in a colander. Set aside. You can also check how to cook Basmati Rice For Biryani.
- Whisk 1 cup fresh curd or yogurt (200 grams) until smooth. Set aside.

Fry Onions
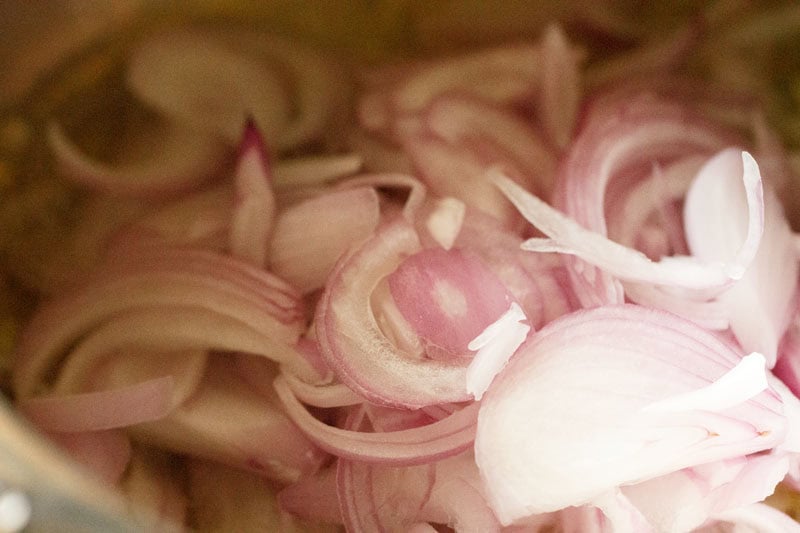
- Heat 3 to 4 tablespoons oil or ghee in a pan. Add 2 cups thinly sliced onions.
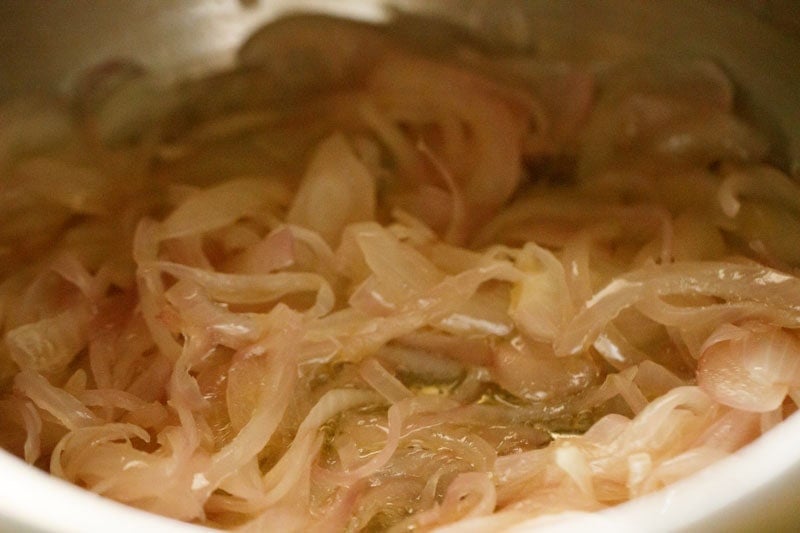
- Stir and sauté the onions on medium-low to medium heat.
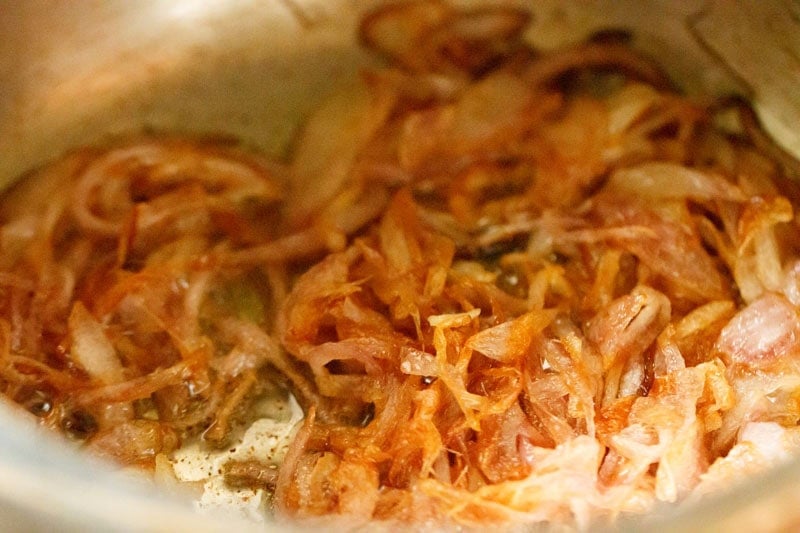
- Sauté the onions, with frequent stirring, till they turn golden brown.
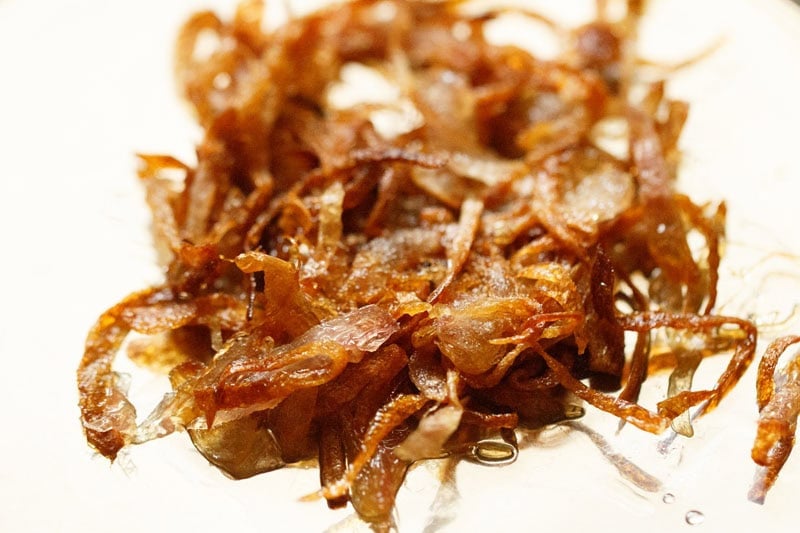
- Keep heat to low, then, remove ¼ cup fried onions from this and set aside.
Make Vegetable Mixture
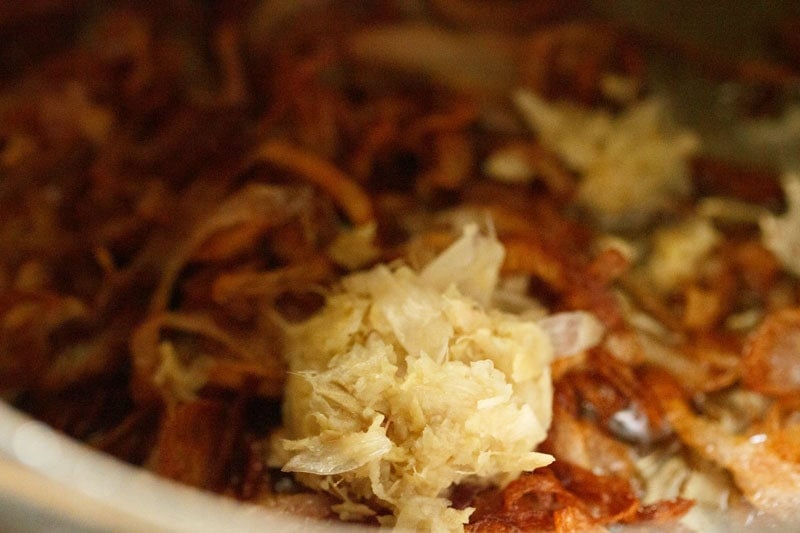
- Then, add 1 tablespoon ginger-garlic paste to the fried onions in the pan. Stir and sauté until the raw aroma of ginger-garlic fades away.
- Then, add the prepared biryani masala. Stir and mix on low heat.
- Add the chopped vegetables including the green peas.
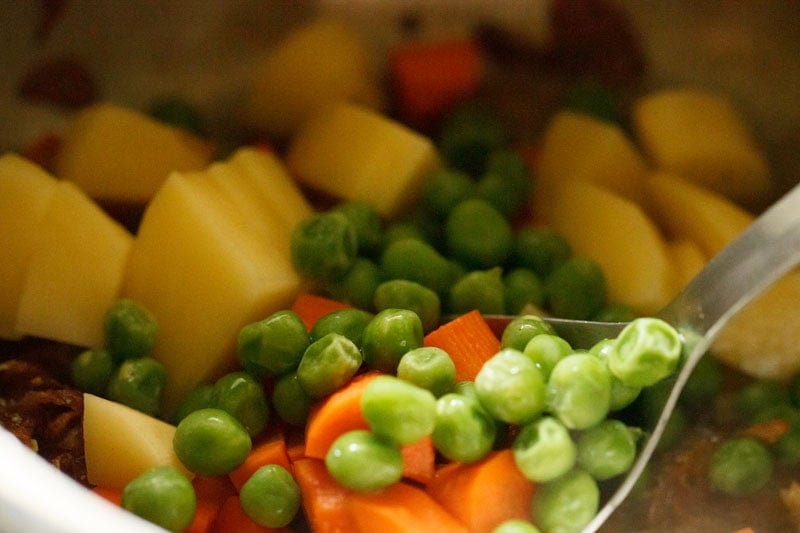
- Stir and mix very well.

Make Vegetable Gravy
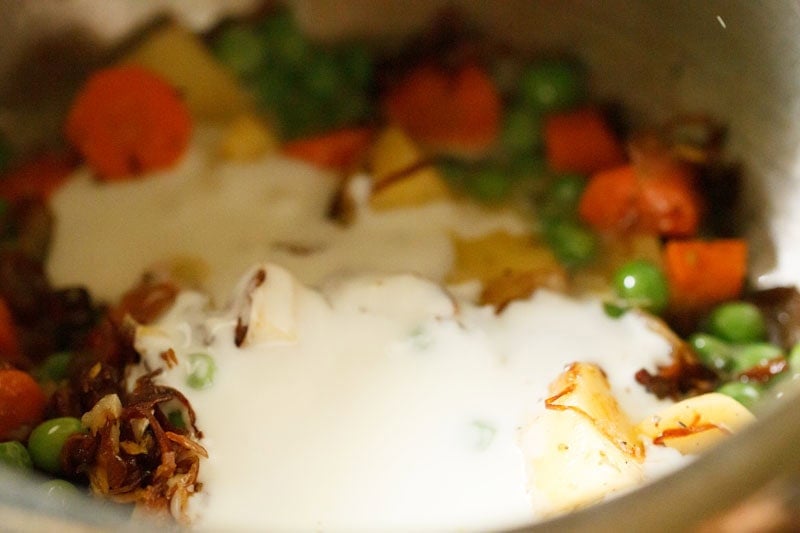
- Then, add the whisked curd.
- Add ½ to 1 teaspoon red chili powder.
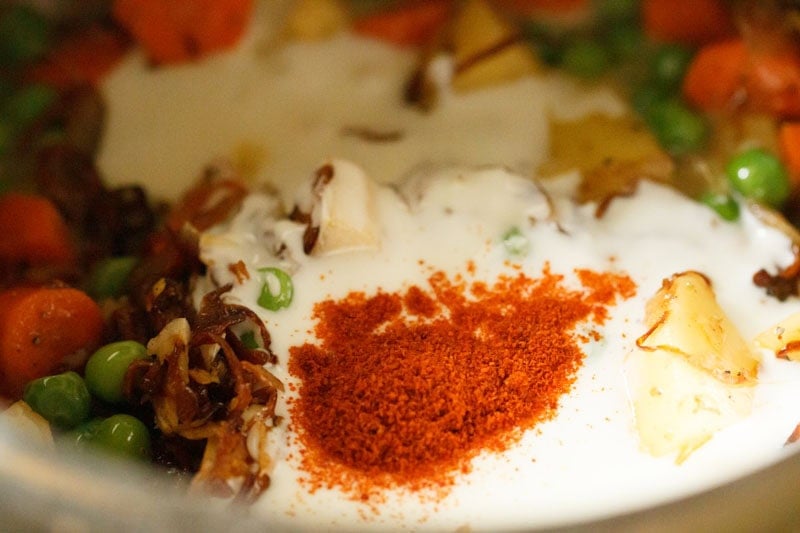
- Stir the gravy mixture very well.
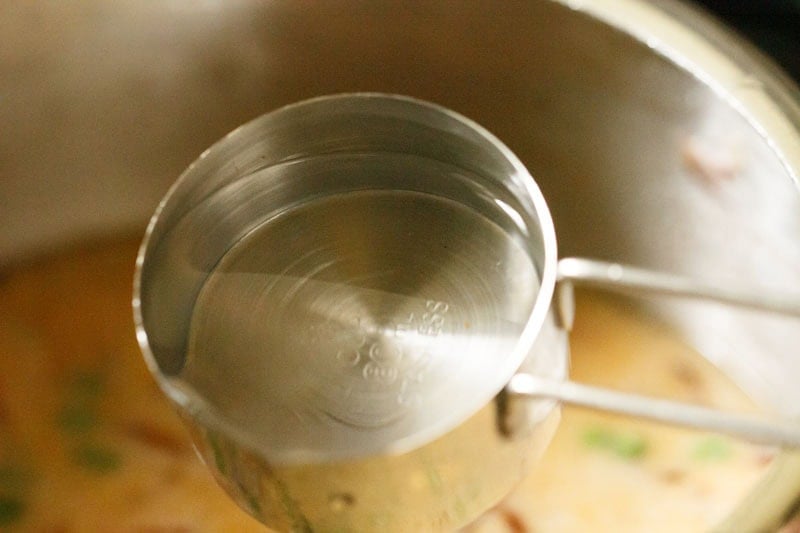
- Add ½ cup of water.
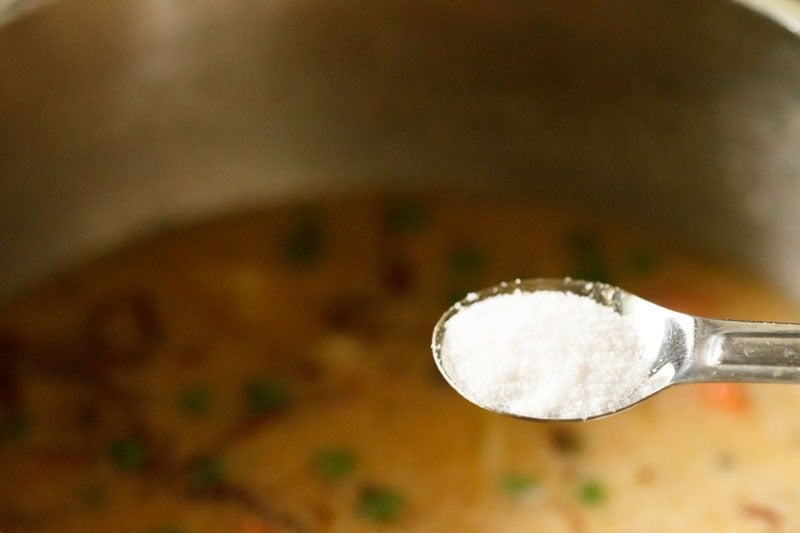
- Add salt as per taste.
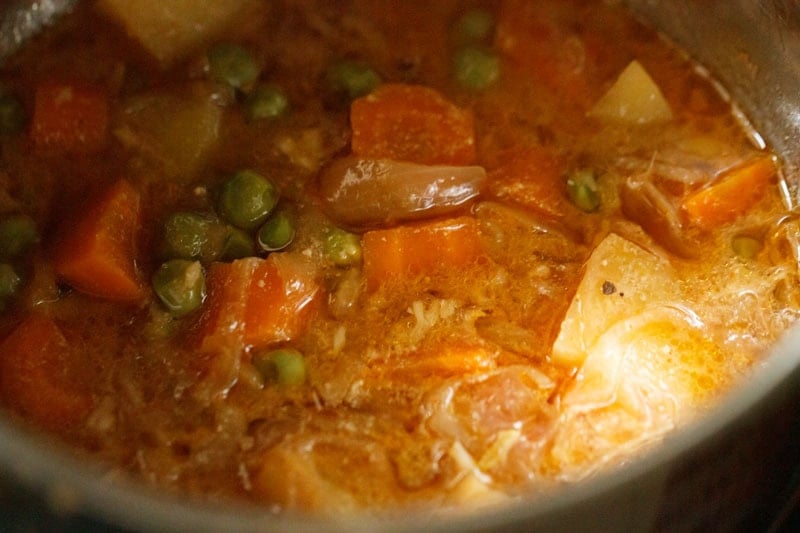
- Pressure cook on medium heat for 1 whistle. If cooking in a pot, then cook till the vegetables are fork tender and done. Don’t overcook.
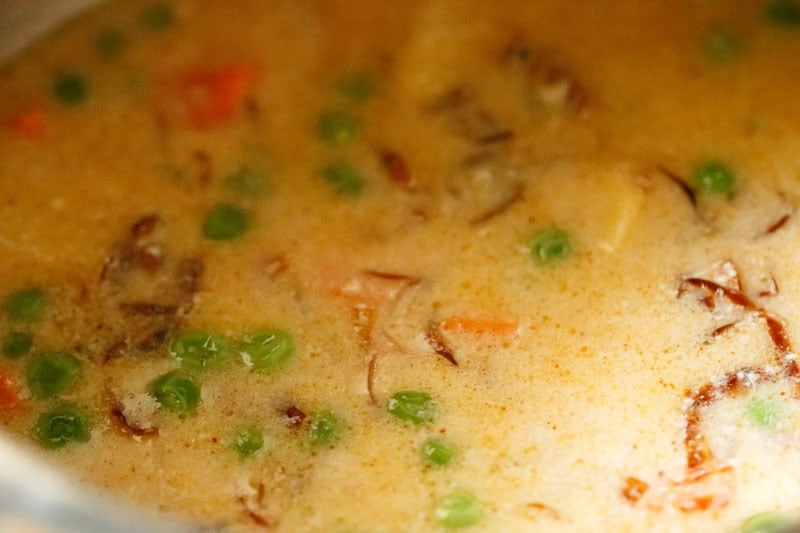
When the pressure settles down and drops naturally in the cooker, remove the lid and check the gravy. If vegetables are undercooked, keep the cooker on the stovetop and simmer the gravy without the lid till the vegetables are tender.
If there is too much water in the gravy, simmer till some water dries up. The gravy should have a medium-thick or slightly thick consistency and should not be very watery or runny.
Assemble Vegetable Biryani
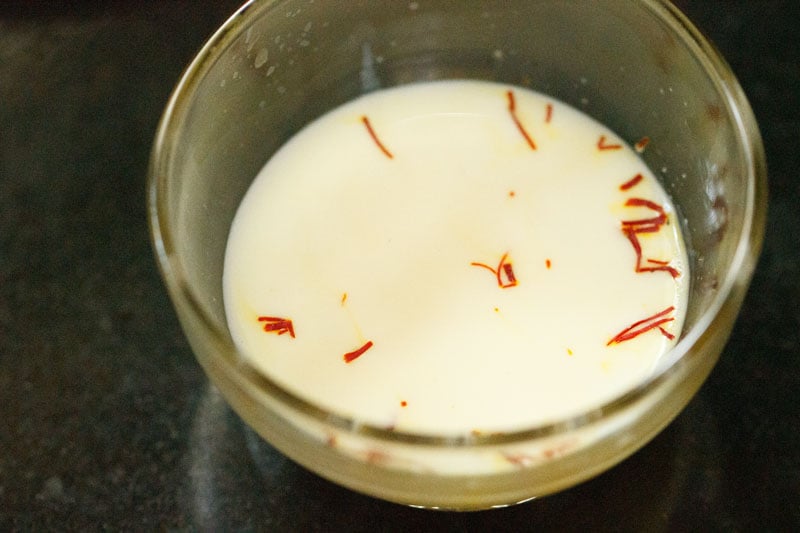
- In a small bowl, take 2 tablespoons warm milk. Add a few saffron strands and mix well. Keep aside for 10 to 15 minutes.
- In another thick-bottomed pan, add half of the prepared vegetable gravy.
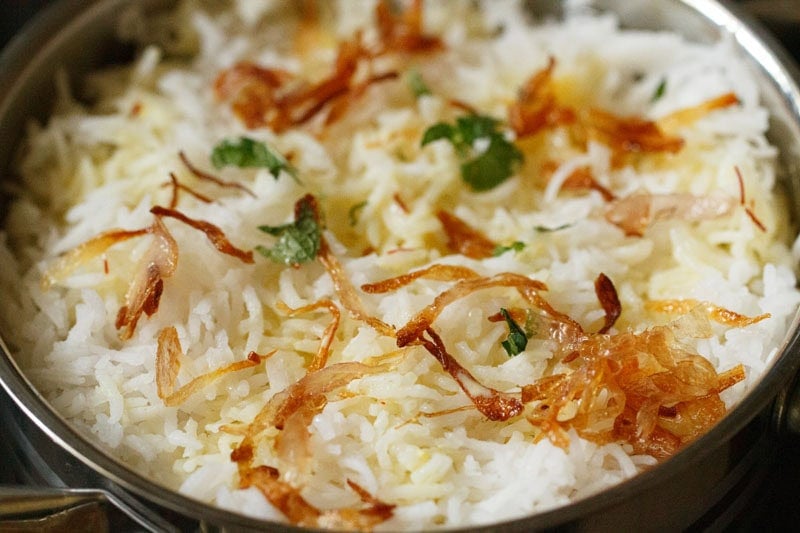
- Layer with half of the rice.
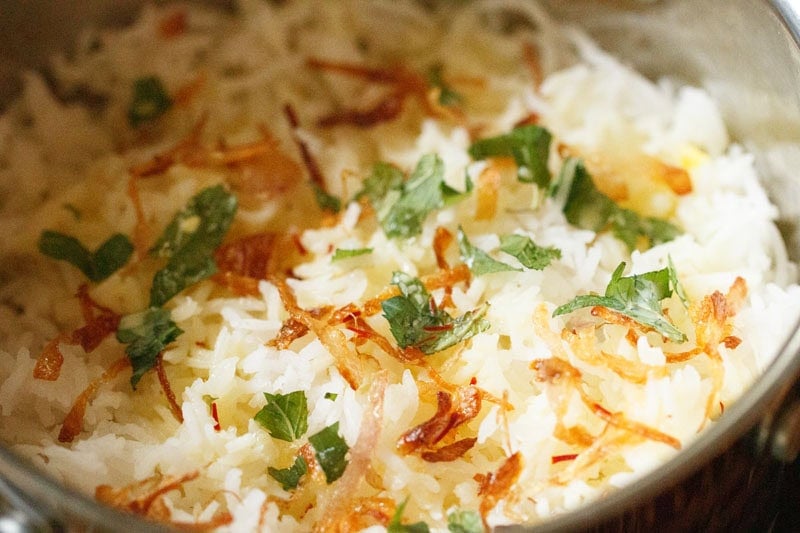
- Sprinkle half of the fried onions along with chopped mint leaves. Also, add half of the saffron dissolved milk. Top with 1 tablespoon oil or butter or ghee on this layer.
- Layer with the rest of the vegetable gravy.
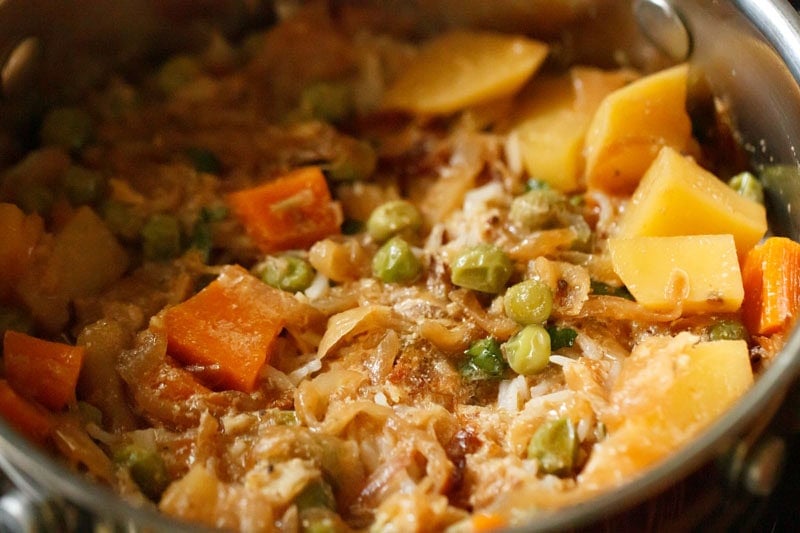
- Lastly, add the remaining fried onions, chopped mint leaves and saffron milk. Top with 1 tablespoon oil or butter or ghee on this layer.
Cook Biryani
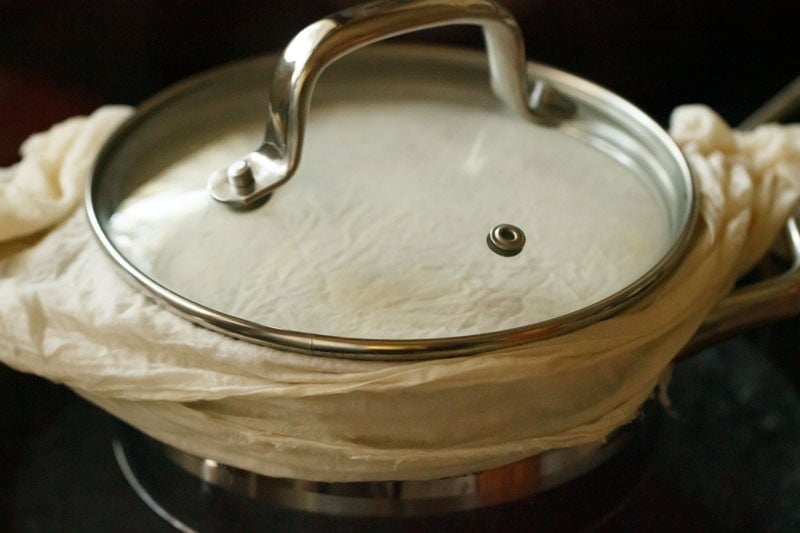
- Cover the pan with a damp muslin or cotton cloth. You can also seal and secure the pan with aluminum foil.

If using a damp cotton napkin, bring together the edges on top of the lid and stick it on the lid. Since the cloth is wet it clings onto the lid.
- Place a lid on top.
- Now, place the pan on a hot tawa or griddle. Cook the biryani on low heat for 25 to 30 minutes or until all the liquids have been absorbed and the rice grains look more fluffier and tender.
The tawa should be heated for 4 to 5 minutes on low to medium flame before you place the pan on it.
Remember to allow a resting time of 5 to 7 minutes after you turn off the heat.
Baking: Bake the biryani at 180 degrees C/356 degrees F in a preheated oven for 20 to 25 minutes. Remember to use an ovenproof glass utensil like a Pyrex bowl for baking in the oven. Assemble the biryani as mentioned above in the ovenproof utensil. Cover with aluminum foil or the Pyrex bowl’s lid and then bake.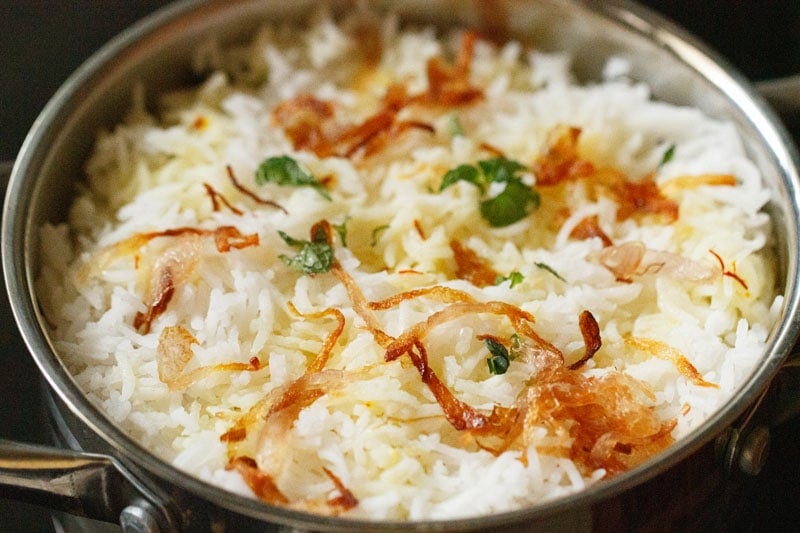
- Serve Restaurant Style Vegetable Biryani with your favorite raita or biryani shorba or mirchi ka salan and with sliced onions and lemon wedges.

ತರಕಾರಿ ಬಿರಿಯಾನಿ (ರೆಸ್ಟೋರೆಂಟ್ ಶೈಲಿ)
ನಮ್ಮಲ್ಲಿ ಯಾರೂ, ವಿಶೇಷವಾಗಿ ನಾವು ಭಾರತೀಯರು, ಸಾಕಷ್ಟು ಬಿರಿಯಾನಿಯನ್ನು ಸಹ ಹೊಂದಲು ಸಾಧ್ಯವಿಲ್ಲ. ಬಿರಿಯಾನಿ ನನ್ನ ನೆಚ್ಚಿನ ಅಕ್ಕಿ ಆಧಾರಿತ ಖಾದ್ಯ. ನಾನು ಪ್ರತಿದಿನ ಬಿರಿಯಾನಿಯನ್ನು ಹೊಂದಿರಬೇಕಾಗಿದ್ದರೂ, ನಾನು ಅದನ್ನು ಮನಸ್ಸಿಲ್ಲ. ಆದ್ದರಿಂದ, ರೆಸ್ಟೋರೆಂಟ್ ಶೈಲಿಯ ತರಕಾರಿ ಬಿರಿಯಾನಿಗಾಗಿ ನಾನು ಆಯ್ಕೆ ಮಾಡಿದ ಪಾಕವಿಧಾನ ಇಲ್ಲಿದೆ, ಅದು ಸಸ್ಯಾಹಾರಿ ಬಿರಿಯಾನಿಯನ್ನು ಮನೆಯಲ್ಲಿ ವಿಸ್ತಾರವಾಗಿ ಹೊರಹಾಕಲು ಸಹಾಯ ಮಾಡುತ್ತದೆ. ಹಂತಗಳನ್ನು ಚೆನ್ನಾಗಿ ಅನುಸರಿಸಿ, ಮತ್ತು ಮನೆಯಲ್ಲಿ ಸುಂದರವಾದ ಹೃತ್ಪೂರ್ವಕ ಬಿರಿಯಾನಿಯನ್ನು ಮಾಡಲು ನಿಮಗೆ ಯಾವುದೇ ಸಮಸ್ಯೆಗಳಿಲ್ಲ. ಪ್ರಕ್ರಿಯೆಯು ಸ್ವಲ್ಪ ಉದ್ದವಾಗಿದೆ ಮತ್ತು ಶ್ರಮವನ್ನು ತೆಗೆದುಕೊಳ್ಳುತ್ತದೆ, ಆದರೆ ಫಲಿತಾಂಶವು ಆ ಸಮಯಕ್ಕೆ ಯೋಗ್ಯವಾಗಿರುತ್ತದೆ.
ಈ ರೆಸ್ಟೋರೆಂಟ್ ಶೈಲಿಯ ತರಕಾರಿ ಬಿರಿಯಾನಿಯನ್ನು ಮೊದಲು ಒಂದು ದಶಕದ ಹಿಂದೆಯೇ ಪೋಸ್ಟ್ ಮಾಡಲಾಯಿತು. ಆ ಸಮಯದಲ್ಲಿ, ನಾನು ಯಾವಾಗಲೂ ಹೈದರಾಬಾಡಿ ವೆಜ್ ಬಿರಿಯಾನಿ ಅಥವಾ ನನ್ನ ತಾಯಿಯ ಬಿರಿಯಾನಿಯ ಆವೃತ್ತಿಯನ್ನು ಮನೆಯಲ್ಲಿ ತಯಾರಿಸುತ್ತೇನೆ. ಆದರೆ ನಾನು ಈ ನಿರ್ದಿಷ್ಟ ಪಾಕವಿಧಾನವನ್ನು ತಯಾರಿಸಲು ಪ್ರಾರಂಭಿಸಿದ ಸಮಯದಿಂದ, ನಾನು ನಿಲ್ಲಿಸಲಿಲ್ಲ.
ಸಾಮಾನ್ಯವಾಗಿ ಹೆಚ್ಚಿನ ರೆಸ್ಟೋರೆಂಟ್ಗಳಲ್ಲಿ, ಅವರು ಬಿರಿಯಾನಿಸ್ ಅನ್ನು ಸಾಂಪ್ರದಾಯಿಕವಾಗಿ ತಯಾರಿಸಿದ ರೀತಿಯಲ್ಲಿ ಮಾಡುವುದಿಲ್ಲ, ಅದು ಅಕ್ಕಿ ಮತ್ತು ಗ್ರೇವಿ ಪದರಗಳನ್ನು ಜೋಡಿಸುವುದು ಮತ್ತು ಇವುಗಳನ್ನು ಬಿಗಿಯಾಗಿ ಮೊಹರು ಮಾಡಿದ ಪಾತ್ರೆಯಲ್ಲಿ ಬೇಯಿಸುವುದು. ತರಕಾರಿ ಗ್ರೇವಿಯನ್ನು ಮುಂದೆ ಸಿದ್ಧಪಡಿಸಲಾಗುತ್ತದೆ ಮತ್ತು ನಂತರ ತಿಳಿವಳಿಕೆ ಬಾಸ್ಮತಿ ಅಕ್ಕಿಯೊಂದಿಗೆ ಲಘುವಾಗಿ ಬೆರೆಸಿ ಬಡಿಸಲಾಗುತ್ತದೆ.
ಆದರೆ ಕೆಲವು ರೆಸ್ಟೋರೆಂಟ್ಗಳು ನಿಜವಾದ ಸಾಂಪ್ರದಾಯಿಕ ಬಿರಿಯಾನಿಯನ್ನು ಪೂರೈಸುತ್ತವೆ. ಈ ನಿರ್ದಿಷ್ಟ ಪಾಕವಿಧಾನವು ಅಂತಹ ರೆಸ್ಟೋರೆಂಟ್ಗಳಲ್ಲಿ ಬಡಿಸಿದ ಬಿರಿಯಾನಿಸ್ಗೆ ಇದೇ ರೀತಿಯ ಅಭಿರುಚಿ ಮತ್ತು ರುಚಿಗಳನ್ನು ಹೊಂದಿದೆ, ಅಲ್ಲಿ ಅಧಿಕೃತ ಸಾಂಪ್ರದಾಯಿಕ ಆಹಾರವನ್ನು ನೀಡಲಾಗುತ್ತದೆ.
ನಾನು ತರಕಾರಿ ಬಿರಿಯಾನಿಯ ಅನೇಕ ಮಾರ್ಪಾಡುಗಳನ್ನು ಪ್ರಯೋಗಿಸಿದ್ದೇನೆ ಮತ್ತು ಪ್ರಯತ್ನಿಸಿದ್ದೇನೆ. ನೀತಾ ಮೆಹ್ತಾ ಅವರ ಕುಕ್ಬುಕ್, ‘ಟೇಸ್ಟ್ ಆಫ್ ಅಮೃತಸರ – ಸಸ್ಯಾಹಾರಿ’ ದಲ್ಲಿ ನಾನು ಈ ಪಾಕವಿಧಾನವನ್ನು ನೋಡಿದ ನಂತರ ನಾನು ಇದನ್ನು ಪ್ರಯತ್ನಿಸಿದೆ ಮತ್ತು ನಮ್ಮ ರುಚಿ ಮೊಗ್ಗುಗಳಿಗೆ ತಕ್ಕಂತೆ ಪಾಕವಿಧಾನವನ್ನು ಸಡಿಲವಾಗಿ ಅಳವಡಿಸಿಕೊಂಡಿದ್ದೇನೆ. ಪಾಕವಿಧಾನದಲ್ಲಿ ನಾನು ಇಷ್ಟಪಟ್ಟದ್ದು ಹೊಸದಾಗಿ ನೆಲದ ಬಿರಿಯಾನಿ ಮಸಾಲಾ ಬಳಕೆ.
ಅಲ್ಲದೆ, ಈ ಆವೃತ್ತಿಯಲ್ಲಿ ಟೊಮ್ಯಾಟೊ, ಮೆಣಸಿನಕಾಯಿ ಅಥವಾ ಅರಿಶಿನ ಇರಲಿಲ್ಲ. ನನ್ನ ಅಡುಗೆಯಲ್ಲಿ ನಾನು ಯಾವಾಗಲೂ ಬಳಸುವುದನ್ನು ಕೊನೆಗೊಳಿಸುವ ಮೂರು ಪದಾರ್ಥಗಳು. ಈ ಮೂರು ಪದಾರ್ಥಗಳನ್ನು ಸೇರಿಸದೆ ಬಿರಿಯಾನಿ ಸಾಧ್ಯವಿಲ್ಲ ಎಂದು ನಾನು ಆಲೋಚನಾ ಪ್ರಕ್ರಿಯೆಯಲ್ಲಿದ್ದೆ. ಆದರೆ ನಾನು ತಪ್ಪಾದ umption ಹೆಯನ್ನು ಹೊಂದಿದ್ದೇನೆ ಮತ್ತು ಈ ಪಾಕವಿಧಾನವು ತಪ್ಪೆಂದು ಸಾಬೀತುಪಡಿಸಿತು.
ನಾನು ಮಾಡಿದ ಅತ್ಯಂತ ರುಚಿಕರವಾದ ಬಿರಿಯಾನಿಸ್ ಈ ನಿಜವಾದ ರೆಸ್ಟೋರೆಂಟ್ ಶೈಲಿಯ ಆವೃತ್ತಿ. ತರಕಾರಿ ಗ್ರೇವಿ ಮನೆಯಲ್ಲಿ ತಯಾರಿಸಿದ ಬಿರಿಯಾನಿಸ್ ಒಲವು ತೋರುವಷ್ಟು ತೇವವಾಗಿಲ್ಲ, ಆದರೆ ರೆಸ್ಟೋರೆಂಟ್ಗಳಲ್ಲಿ ನೀವು ಕಂಡುಕೊಳ್ಳುವಂತೆಯೇ ಸ್ವಲ್ಪ ಒಣಗುತ್ತದೆ. ಹೆಚ್ಚುವರಿಯಾಗಿ, ಈ ಬಿರಿಯಾನಿ ತುಂಬಾ ಮಸಾಲೆಯುಕ್ತವಲ್ಲ; ಬದಲಾಗಿ, ಇದು ಮಾಧುರ್ಯದ ಸೌಮ್ಯ ಸ್ಪರ್ಶವನ್ನು ಹೊಂದಿದೆ.
ಹೊಸದಾಗಿ ನೆಲದ ಬಿರಿಯಾನಿ ಮಸಾಲಾ ಮತ್ತು ಕ್ಯಾರಮೆಲೈಸ್ಡ್/ಬ್ರೌನ್ಡ್ ಈರುಳ್ಳಿಯ ರುಚಿಗಳು ಈ ತರಕಾರಿ ಬಿರಿಯಾನಿಯ ಒಂದು ವಿಶಿಷ್ಟ ಲಕ್ಷಣವಾಗಿದೆ ಮತ್ತು ಇಡೀ ಖಾದ್ಯದಲ್ಲಿ ಉತ್ತಮವಾದದ್ದನ್ನು ಹೊರತರುತ್ತದೆ. ಹೌದು, ಈ ಪಾಕವಿಧಾನದಲ್ಲಿ ಬರಿಸ್ತಾ ಅಥವಾ ಕ್ಯಾರಮೆಲೈಸ್ಡ್ ಬ್ರೌನ್ ಈರುಳ್ಳಿಯನ್ನು ಬಳಸಲಾಗುತ್ತದೆ.
ಪಾಕವಿಧಾನದಲ್ಲಿ ಇನ್ನಷ್ಟು
ಇದೀಗ, ನಾನು ಈ ತರಕಾರಿ ಬಿರಿಯಾನಿಯನ್ನು ಹಲವು ಬಾರಿ ಮಾಡಿದ್ದೇನೆ. ನಾನು ಡೈರಿ ಮೊಸರು (ಮೊಸರು) ಮತ್ತು ಗೋಡಂಬಿ ಮೊಸರಿನಂತಹ ಸಸ್ಯ ಆಧಾರಿತವಾದ ಪಾಕವಿಧಾನವನ್ನು ಪ್ರಯತ್ನಿಸಿದೆ.
ಗೋಡಂಬಿ ಮೊಸರಿನೊಂದಿಗೆ ಮಾಡಿದಾಗ, ನಾನು ಸೇರಿದಂತೆ ಯಾರೂ ಖಾದ್ಯದಲ್ಲಿ ನಿಯಮಿತ ಡೈರಿ ಅಥವಾ ಸಸ್ಯ ಆಧಾರಿತ ಮೊಸರು ಬಳಸಲಾಗಿದೆಯೆ ಎಂಬ ವ್ಯತ್ಯಾಸವನ್ನು ಹೊರಹಾಕಲು ಸಾಧ್ಯವಿಲ್ಲ.
ನಾನು ಆರಂಭದಲ್ಲಿ ಹೇಳಿದಂತೆ, ಇದು ರೆಸ್ಟೋರೆಂಟ್ ಶೈಲಿಯ ಬಿರಿಯಾನಿಯನ್ನು ತಯಾರಿಸುವ ದೀರ್ಘ ಪ್ರಕ್ರಿಯೆಯಾಗಿದೆ ಆದರೆ ಅದು ಯೋಗ್ಯವಾಗಿದೆ. ಕೆಲವನ್ನು ಹೊರತುಪಡಿಸಿ, ಉಳಿದ ಪದಾರ್ಥಗಳು ಅಡುಗೆಮನೆಯಲ್ಲಿ ಸರಳ ಮತ್ತು ಸುಲಭವಾಗಿ ಲಭ್ಯವಿದೆ.
ಕೇಸರಿ ಬದಲಿಗಾಗಿ, ನೀವು ಕೆಲವು ಹಾಲು ಅಥವಾ ನೀರಿನಲ್ಲಿ ಒಂದು ಪಿಂಚ್ ಅರಿಶಿನವನ್ನು ಸೇರಿಸಬಹುದು ಮತ್ತು ನಂತರ ಅದನ್ನು ಅಕ್ಕಿ ಪದರಗಳಿಗೆ ಸೇರಿಸಬಹುದು.
ಹಸಿರು ಮೆಣಸಿನಕಾಯಿ ಅಥವಾ ಕೆಂಪು ಮೆಣಸಿನ ಪುಡಿ ಇಲ್ಲದೆ ನನ್ನ ಆಹಾರವನ್ನು imagine ಹಿಸಲು ಸಾಧ್ಯವಿಲ್ಲ. ಆದ್ದರಿಂದ, ನಾನು ಈ ತರಕಾರಿ ಬಿರಿಯಾನಿಗೆ ಸ್ವಲ್ಪ ಕೆಂಪು ಮೆಣಸಿನ ಪುಡಿಯನ್ನು ಸೇರಿಸಬೇಕಾಗಿತ್ತು.
ಸಸ್ಯಾಹಾರಿಗಳೊಂದಿಗೆ ಈ ಬಿರಿಯಾನಿ ಮತ್ತು ಹೊಸದಾಗಿ ನೆಲದ ಮಸಾಲಾದೊಂದಿಗೆ ತಯಾರಿಸಲಾಗುತ್ತದೆ ಮತ್ತು ನಾನು ಅದನ್ನು ನಿಮ್ಮೆಲ್ಲರೊಂದಿಗೆ ಹಂಚಿಕೊಳ್ಳಬೇಕಾಗಿತ್ತು. ನಾನು ಸಾಮಾನ್ಯವಾಗಿ ಈ ಬಿರಿಯಾನಿಯನ್ನು ತಾಜಾ ಈರುಳ್ಳಿ ಟೊಮೆಟೊ ರೈಟಾದೊಂದಿಗೆ ಬಡಿಸುತ್ತೇನೆ.
ಹಂತ ಹಂತದ ಮಾರ್ಗದರ್ಶಿ
ರೆಸ್ಟೋರೆಂಟ್ ಶೈಲಿಯನ್ನು ತರಕಾರಿ ಬಿರಿಯಾನಿ ಮಾಡುವುದು ಹೇಗೆ
ಸಿದ್ಧತೆ
- 1½ ಕಪ್ (200 ಗ್ರಾಂ) ಬಾಸ್ಮತಿ ಅಕ್ಕಿ ನೀರಿನಲ್ಲಿ ಚೆನ್ನಾಗಿ ತೊಳೆಯಿರಿ. ಅಕ್ಕಿಯನ್ನು ಸಾಕಷ್ಟು ನೀರಿನಲ್ಲಿ 30 ನಿಮಿಷಗಳ ಕಾಲ ನೆನೆಸಿ. ಅಕ್ಕಿ ನೆನೆಸುವಾಗ, ಎಲ್ಲಾ ತರಕಾರಿಗಳನ್ನು ಕತ್ತರಿಸಿ ಪಕ್ಕಕ್ಕೆ ಇರಿಸಿ.
- ಬಿರಿಯಾನಿ ಮಸಾಲವನ್ನು ತಯಾರಿಸಿ. ಅದಕ್ಕಾಗಿ, ನಾವು ಬಳಸುವ ಮಸಾಲೆಗಳು – 1 ಇಂಚಿನ ದಾಲ್ಚಿನ್ನಿ ಕೋಲು, 4 ಲವಂಗ, 4 ಹಸಿರು ಏಲಕ್ಕಿ ಮತ್ತು ಒಂದೇ ಎಳೆಯನ್ನು ಮೆಸ್ (ಇಡೀ ಮೇಸ್ ಅಲ್ಲ, ಇದು ಬಲವಾದ ಮಸಾಲೆಗಳಾಗಿರುವುದರಿಂದ).
- ಇವುಗಳನ್ನು ಸಣ್ಣ ಗ್ರೈಂಡರ್ ಅಥವಾ ಸ್ಪೈಸ್ ಗ್ರೈಂಡರ್ನಲ್ಲಿ ಸೇರಿಸಿ ಮತ್ತು ಪುಡಿಗೆ ಪುಡಿಮಾಡಿ. ಪಕ್ಕಕ್ಕೆ ಇರಿಸಿ.
- 30 ನಿಮಿಷಗಳ ನಂತರ, ಅಕ್ಕಿಯಿಂದ ಎಲ್ಲಾ ನೀರನ್ನು ಹರಿಸುತ್ತವೆ ಮತ್ತು ನೆನೆಸಿದ ಅಕ್ಕಿಯನ್ನು ಪಕ್ಕಕ್ಕೆ ಇರಿಸಿ.
ಅಕ್ಕಿ ತಯಾರಿಸಿ
5 ಕಪ್ ನೀರನ್ನು ಬಿಸಿ ಮಾಡಿ. ಬಿಸಿಯಾದಾಗ, 3 ರಿಂದ 4 ಹಸಿರು ಏಲಕ್ಕಿ, 1 ಇಂಚಿನ ದಾಲ್ಚಿನ್ನಿ, 1 ಮಧ್ಯಮ ತೇಜ್ ಪಟ್ಟಾ (ಇಂಡಿಯನ್ ಬೇ ಲೀಫ್), 2 ಸ್ಟಾರ್ ಸೋಂಪು ಮತ್ತು 1 ಕಪ್ಪು ಏಲಕ್ಕಿ ಸೇರಿಸಿ.
6. ಹೆಚ್ಚಿನ ಶಾಖದಲ್ಲಿ, ನೀರನ್ನು ಕುದಿಯಲು ತಂದುಕೊಡಿ. ನಂತರ, ಅಕ್ಕಿ ಸೇರಿಸಿ. ಅಲ್ಲದೆ, ¾ ಟೀಸ್ಪೂನ್ ಉಪ್ಪು ಅಥವಾ ರುಚಿಗೆ ಅನುಗುಣವಾಗಿ ಸೇರಿಸಿ.
- 75% ಬೇಯಿಸುವವರೆಗೆ ಅಕ್ಕಿಯನ್ನು ಹೆಚ್ಚಿನ ಶಾಖದಲ್ಲಿ ಬೇಯಿಸಿ.
- ಅಕ್ಕಿಯಲ್ಲಿ ಸ್ವಲ್ಪ ಕಚ್ಚಬೇಕು.
- ಅಕ್ಕಿಯಿಂದ ಎಲ್ಲಾ ನೀರನ್ನು ಕೋಲಾಂಡರ್ನಲ್ಲಿ ಸಂಪೂರ್ಣವಾಗಿ ಹರಿಸುತ್ತವೆ. ಪಕ್ಕಕ್ಕೆ ಇರಿಸಿ. ಬಿರಿಯಾನಿಗಾಗಿ ಬಾಸ್ಮತಿ ಅಕ್ಕಿ ಹೇಗೆ ಬೇಯಿಸುವುದು ಎಂದು ನೀವು ಪರಿಶೀಲಿಸಬಹುದು.
- ನಯವಾದ ತನಕ 1 ಕಪ್ ತಾಜಾ ಮೊಸರು ಅಥವಾ ಮೊಸರು (200 ಗ್ರಾಂ). ಪಕ್ಕಕ್ಕೆ ಇರಿಸಿ.
- ಬಾಣಲೆಯಲ್ಲಿ 3 ರಿಂದ 4 ಚಮಚ ತೈಲ ಅಥವಾ ತುಪ್ಪವನ್ನು ಬಿಸಿ ಮಾಡಿ. ತೆಳುವಾಗಿ ಕತ್ತರಿಸಿದ ಈರುಳ್ಳಿ 2 ಕಪ್ ಸೇರಿಸಿ.
- ಮಧ್ಯಮ-ಕಡಿಮೆ ಮಧ್ಯಮ ಶಾಖದಲ್ಲಿ ಈರುಳ್ಳಿಯನ್ನು ಬೆರೆಸಿ ಮತ್ತು ಬೇಯಿಸಿ.
- ಗೋಲ್ಡನ್ ಬ್ರೌನ್ ಆಗುವವರೆಗೆ ಆಗಾಗ್ಗೆ ಸ್ಫೂರ್ತಿದಾಯಕವಾಗಿ ಈರುಳ್ಳಿಯನ್ನು ಬೇಯಿಸಿ.
- ಶಾಖವನ್ನು ಕಡಿಮೆ ಮಾಡಿ, ನಂತರ, ¼ ಕಪ್ ಫ್ರೈಡ್ ಈರುಳ್ಳಿಯನ್ನು ತೆಗೆದುಹಾಕಿ ಮತ್ತು ಪಕ್ಕಕ್ಕೆ ಇರಿಸಿ.
ತರಕಾರಿ ಮಿಶ್ರಣವನ್ನು ಮಾಡಿ
- ನಂತರ, ಪ್ಯಾನ್ನಲ್ಲಿರುವ ಹುರಿದ ಈರುಳ್ಳಿಗೆ 1 ಚಮಚ ಶುಂಠಿ-ಗಾರ್ಲಿಕ್ ಪೇಸ್ಟ್ ಸೇರಿಸಿ. ಶುಂಠಿ-ಬೆಳ್ಳಿ ಮಸುಕಾಗುವವರೆಗೆ ಬೆರೆಸಿ ಮತ್ತು ಬೇಯಿಸಿ.
- ನಂತರ, ತಯಾರಾದ ಬಿರಿಯಾನಿ ಮಸಾಲವನ್ನು ಸೇರಿಸಿ. ಕಡಿಮೆ ಶಾಖದ ಮೇಲೆ ಬೆರೆಸಿ ಮಿಶ್ರಣ ಮಾಡಿ.
- ಹಸಿರು ಬಟಾಣಿ ಸೇರಿದಂತೆ ಕತ್ತರಿಸಿದ ತರಕಾರಿಗಳನ್ನು ಸೇರಿಸಿ.
- ಚೆನ್ನಾಗಿ ಬೆರೆಸಿ ಚೆನ್ನಾಗಿ ಮಿಶ್ರಣ ಮಾಡಿ.
ತರಕಾರಿ ಗ್ರೇವಿ ಮಾಡಿ
- ನಂತರ, ಪೊರಕೆ ಹಾಕಿದ ಮೊಸರು ಸೇರಿಸಿ.
- ½ ರಿಂದ 1 ಟೀಸ್ಪೂನ್ ಕೆಂಪು ಮೆಣಸಿನ ಪುಡಿಯನ್ನು ಸೇರಿಸಿ.
- ಗ್ರೇವಿ ಮಿಶ್ರಣವನ್ನು ಚೆನ್ನಾಗಿ ಬೆರೆಸಿ.
- ½ ಕಪ್ ನೀರು ಸೇರಿಸಿ.
- ರುಚಿಗೆ ಅನುಗುಣವಾಗಿ ಉಪ್ಪು ಸೇರಿಸಿ.
- 1 ಶಿಳ್ಳೆ ಮಧ್ಯಮ ಶಾಖದ ಮೇಲೆ ಒತ್ತಡ ಬೇಯಿಸಿ. ಮಡಕೆಯಲ್ಲಿ ಅಡುಗೆ ಮಾಡಿದರೆ, ತರಕಾರಿಗಳು ಫೋರ್ಕ್ ಟೆಂಡರ್ ಆಗುವವರೆಗೆ ಬೇಯಿಸಿ. ಅತಿಯಾಗಿ ಬೇಯಿಸಬೇಡಿ.
ಒತ್ತಡವು ನೆಲೆಗೊಂಡಾಗ ಮತ್ತು ಕುಕ್ಕರ್ನಲ್ಲಿ ಸ್ವಾಭಾವಿಕವಾಗಿ ಇಳಿಯುವಾಗ, ಮುಚ್ಚಳವನ್ನು ತೆಗೆದುಹಾಕಿ ಮತ್ತು ಗ್ರೇವಿಯನ್ನು ಪರಿಶೀಲಿಸಿ. ತರಕಾರಿಗಳನ್ನು ಬೇಯಿಸಿದರೆ, ಕುಕ್ಕರ್ ಅನ್ನು ಸ್ಟೌಟಾಪ್ನಲ್ಲಿ ಇರಿಸಿ ಮತ್ತು ತರಕಾರಿಗಳು ಕೋಮಲವಾಗುವವರೆಗೆ ಮುಚ್ಚಳವಿಲ್ಲದೆ ಗ್ರೇವಿಯನ್ನು ತಳಮಳಿಸುತ್ತಿರು.
ಗ್ರೇವಿಯಲ್ಲಿ ಹೆಚ್ಚು ನೀರು ಇದ್ದರೆ, ಸ್ವಲ್ಪ ನೀರು ಒಣಗುವವರೆಗೆ ತಳಮಳಿಸುತ್ತಿರು. ಗ್ರೇವಿ ಮಧ್ಯಮ-ದಪ್ಪ ಅಥವಾ ಸ್ವಲ್ಪ ದಪ್ಪವಾದ ಸ್ಥಿರತೆಯನ್ನು ಹೊಂದಿರಬೇಕು ಮತ್ತು ತುಂಬಾ ನೀರಿರುವ ಅಥವಾ ಸ್ರವಿಸಬಾರದು.
ತರಕಾರಿ ಬಿರಿಯಾನಿ ಜೋಡಿಸಿ
- ಸಣ್ಣ ಬಟ್ಟಲಿನಲ್ಲಿ, 2 ಚಮಚ ಬೆಚ್ಚಗಿನ ಹಾಲು ತೆಗೆದುಕೊಳ್ಳಿ. ಕೆಲವು ಕೇಸರಿ ಎಳೆಗಳನ್ನು ಸೇರಿಸಿ ಚೆನ್ನಾಗಿ ಮಿಶ್ರಣ ಮಾಡಿ. 10 ರಿಂದ 15 ನಿಮಿಷಗಳ ಕಾಲ ಪಕ್ಕಕ್ಕೆ ಇರಿಸಿ.
- ಮತ್ತೊಂದು ದಪ್ಪ-ಕೆಳಭಾಗದ ಪ್ಯಾನ್ನಲ್ಲಿ, ತಯಾರಾದ ತರಕಾರಿ ಗ್ರೇವ್ನ ಅರ್ಧದಷ್ಟು ಸೇರಿಸಿ.
- ಅರ್ಧದಷ್ಟು ಅಕ್ಕಿಯೊಂದಿಗೆ ಪದರ.
- ಕತ್ತರಿಸಿದ ಪುದೀನ ಎಲೆಗಳೊಂದಿಗೆ ಅರ್ಧದಷ್ಟು ಹುರಿದ ಈರುಳ್ಳಿಯನ್ನು ಸಿಂಪಡಿಸಿ. ಅಲ್ಲದೆ, ಕೇಸರಿ ಕರಗಿದ ಹಾಲಿನ ಅರ್ಧದಷ್ಟು ಸೇರಿಸಿ. ಈ ಪದರದಲ್ಲಿ 1 ಚಮಚ ಎಣ್ಣೆ ಅಥವಾ ಬೆಣ್ಣೆ ಅಥವಾ ತುಪ್ಪದೊಂದಿಗೆ ಟಾಪ್.
- ಉಳಿದ ತರಕಾರಿ ಗ್ರೇವಿಯೊಂದಿಗೆ ಲೇಯರ್.
- ಕೊನೆಯದಾಗಿ, ಉಳಿದ ಹುರಿದ ಈರುಳ್ಳಿ, ಕತ್ತರಿಸಿದ ಪುದೀನ ಎಲೆಗಳು ಮತ್ತು ಕೇಸರಿ ಹಾಲನ್ನು ಸೇರಿಸಿ. ಈ ಪದರದಲ್ಲಿ 1 ಚಮಚ ಎಣ್ಣೆ ಅಥವಾ ಬೆಣ್ಣೆ ಅಥವಾ ತುಪ್ಪದೊಂದಿಗೆ ಟಾಪ್.
ಬಿರಿಯಾನಿ ಬೇಯಿಸಿ
- ಪ್ಯಾನ್ ಅನ್ನು ಒದ್ದೆಯಾದ ಮಸ್ಲಿನ್ ಅಥವಾ ಹತ್ತಿ ಬಟ್ಟೆಯಿಂದ ಮುಚ್ಚಿ. ಅಲ್ಯೂಮಿನಿಯಂ ಫಾಯಿಲ್ನೊಂದಿಗೆ ನೀವು ಪ್ಯಾನ್ ಅನ್ನು ಮೊಹರು ಮಾಡಬಹುದು ಮತ್ತು ಸುರಕ್ಷಿತಗೊಳಿಸಬಹುದು.
ಒದ್ದೆಯಾದ ಹತ್ತಿ ಕರವಸ್ತ್ರವನ್ನು ಬಳಸುತ್ತಿದ್ದರೆ, ಮುಚ್ಚಳದ ಮೇಲೆ ಅಂಚುಗಳನ್ನು ಒಟ್ಟುಗೂಡಿಸಿ ಮತ್ತು ಅದನ್ನು ಮುಚ್ಚಳದಲ್ಲಿ ಅಂಟಿಕೊಳ್ಳಿ. ಬಟ್ಟೆ ಒದ್ದೆಯಾಗಿರುವುದರಿಂದ ಅದು ಮುಚ್ಚಳಕ್ಕೆ ಅಂಟಿಕೊಳ್ಳುತ್ತದೆ.
- ಮೇಲೆ ಒಂದು ಮುಚ್ಚಳವನ್ನು ಇರಿಸಿ.
- ಈಗ, ಪ್ಯಾನ್ ಅನ್ನು ಬಿಸಿ ತವಾ ಅಥವಾ ಗ್ರಿಡಲ್ ಮೇಲೆ ಇರಿಸಿ. ಬಿರಿಯಾನಿಯನ್ನು 25 ರಿಂದ 30 ನಿಮಿಷಗಳ ಕಾಲ ಕಡಿಮೆ ಶಾಖದಲ್ಲಿ ಬೇಯಿಸಿ ಅಥವಾ ಎಲ್ಲಾ ದ್ರವಗಳು ಹೀರಿಕೊಳ್ಳುವವರೆಗೆ ಮತ್ತು ಅಕ್ಕಿ ಧಾನ್ಯಗಳು ಹೆಚ್ಚು ನಯವಾಗಿ ಮತ್ತು ಕೋಮಲವಾಗಿ ಕಾಣುತ್ತವೆ.
ನೀವು ಪ್ಯಾನ್ ಮೇಲೆ ಇಡುವ ಮೊದಲು ತಾವಾವನ್ನು ಕಡಿಮೆ ಮತ್ತು ಮಧ್ಯಮ ಜ್ವಾಲೆಯ ಮೇಲೆ 4 ರಿಂದ 5 ನಿಮಿಷಗಳ ಕಾಲ ಬಿಸಿಮಾಡಬೇಕು.
ನೀವು ಶಾಖವನ್ನು ಆಫ್ ಮಾಡಿದ ನಂತರ 5 ರಿಂದ 7 ನಿಮಿಷಗಳ ವಿಶ್ರಾಂತಿ ಸಮಯವನ್ನು ಅನುಮತಿಸಲು ಮರೆಯದಿರಿ.
ಬೇಕಿಂಗ್: ಬಿರಿಯಾನಿಯನ್ನು 180 ಡಿಗ್ರಿ ಸಿ/356 ಡಿಗ್ರಿ ಎಫ್ ನಲ್ಲಿ ಪೂರ್ವಭಾವಿಯಾಗಿ ಕಾಯಿಸಲ್ಪಟ್ಟಿರುವ ಒಲೆಯಲ್ಲಿ 20 ರಿಂದ 25 ನಿಮಿಷಗಳ ಕಾಲ ತಯಾರಿಸಿ. ಒಲೆಯಲ್ಲಿ ಬೇಯಿಸಲು ಪೈರೆಕ್ಸ್ ಬೌಲ್ನಂತೆ ಓವನ್ ಪ್ರೂಫ್ ಗಾಜಿನ ಪಾತ್ರೆಗಳನ್ನು ಬಳಸಲು ಮರೆಯದಿರಿ. ಓವನ್ ಪ್ರೂಫ್ ಪಾತ್ರೆಯಲ್ಲಿ ಮೇಲೆ ಹೇಳಿದಂತೆ ಬಿರಿಯಾನಿಯನ್ನು ಜೋಡಿಸಿ. ಅಲ್ಯೂಮಿನಿಯಂ ಫಾಯಿಲ್ ಅಥವಾ ಪೈರೆಕ್ಸ್ ಬೌಲ್ನ ಮುಚ್ಚಳದಿಂದ ಮುಚ್ಚಿ ನಂತರ ತಯಾರಿಸಿ.
- ರೆಸ್ಟೋರೆಂಟ್ ಶೈಲಿಯ ತರಕಾರಿ ಬಿರಿಯಾನಿ ನಿಮ್ಮ ನೆಚ್ಚಿನ ರೈಟಾ ಅಥವಾ ಬಿರಿಯಾನಿ ಶೋರ್ಬಾ ಅಥವಾ ಮಿರ್ಚಿ ಕಾ ಸಲಾನ್ ಮತ್ತು ಹಲ್ಲೆ ಮಾಡಿದ ಈರುಳ್ಳಿ ಮತ್ತು ನಿಂಬೆ ತುಂಡುಭೂಮಿಗಳೊಂದಿಗೆ ಸೇವೆ ಮಾಡಿ.
 Support Us


